
Getting Started with Hoopcast.tv
Streaming a live basketball match with Hoopcast.tv is straightforward. Below, you will find an explanation of all the controls and settings you’ll need to configure before going live.
Once you launch the app on your iPhone, you’ll land on the Home Screen, which provides all the configuration options for the game you want to stream live.
Home Screen Overview
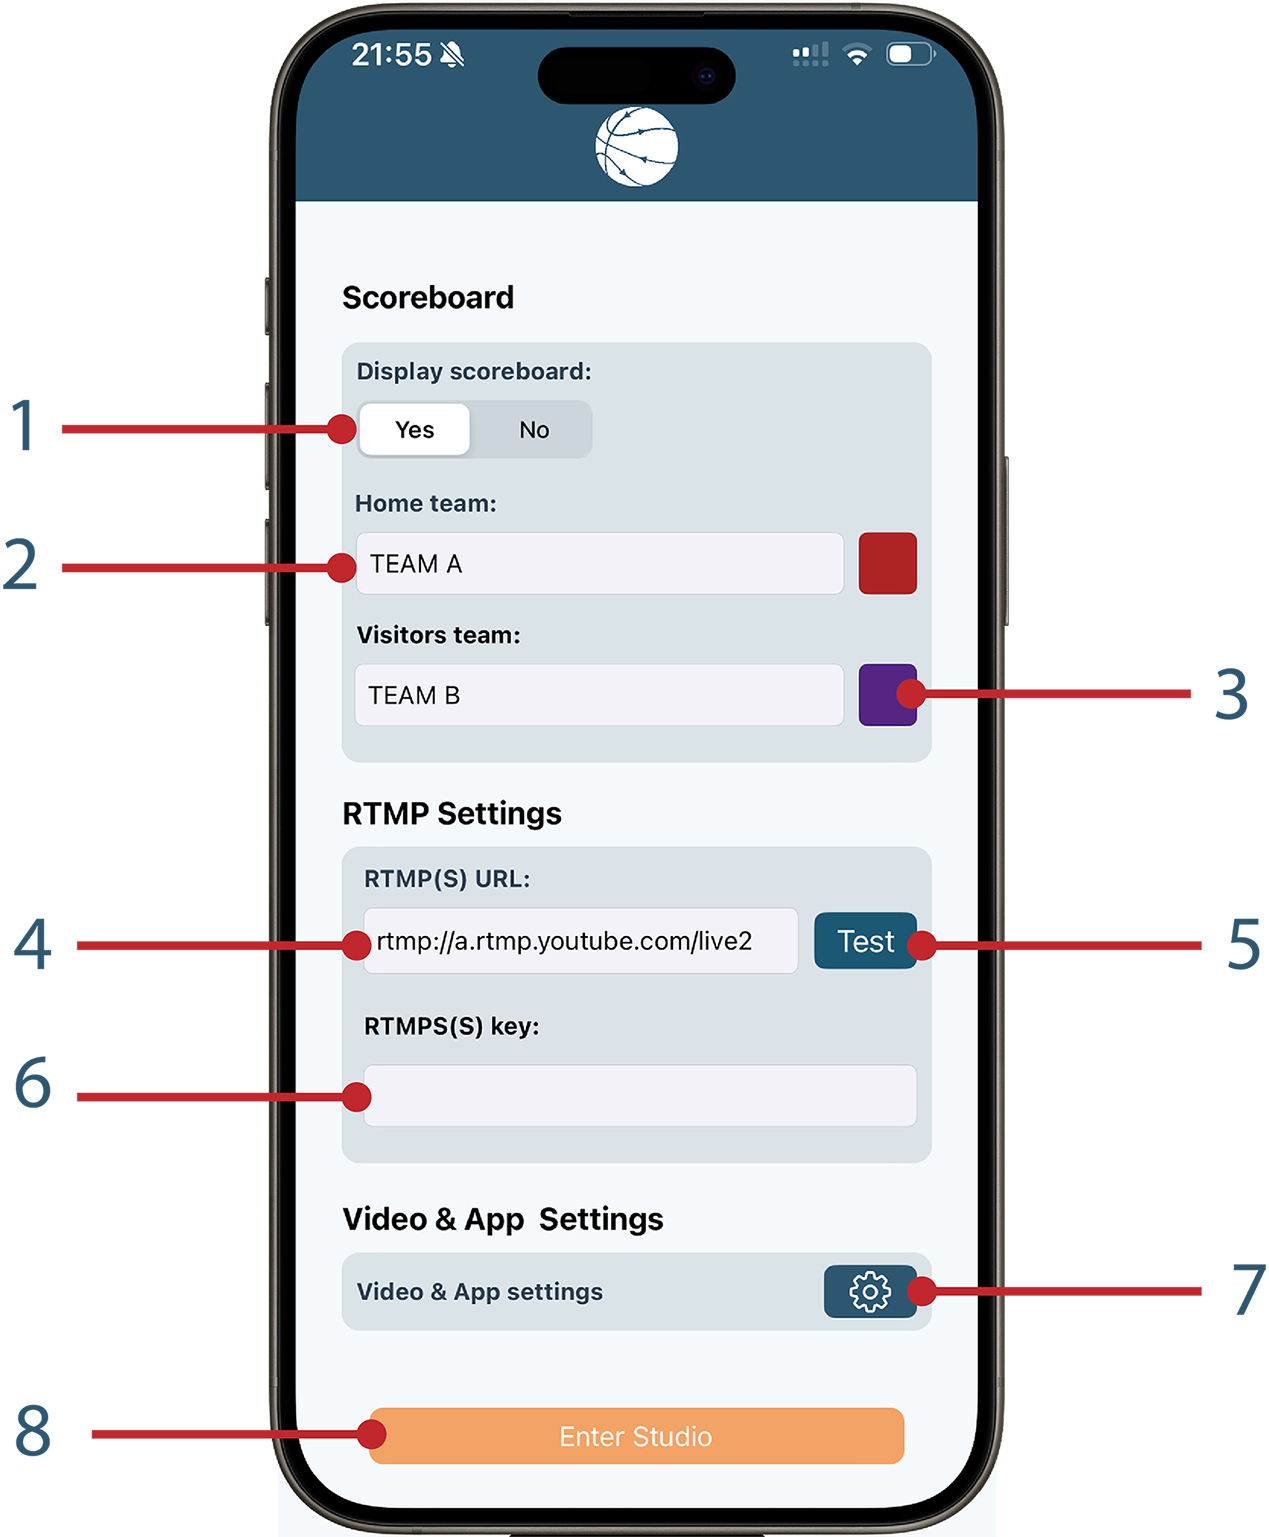
1. Scoreboard Display
Use the Display Scoreboard toggle to disable the overlaid scoreboard. This can be helpful if you don’t need it or if you’re streaming your live match to a relay RTMP server that adds the scoreboard using statistics provided by the table officials.
2. Team Names
Enter the names of the two teams playing. These will appear on the scoreboard overlay during the live stream.
3. Team Colors
Customize each team’s color to match their branding or uniforms. This makes the scoreboard visually clear and intuitive for viewers.
4. RTMP URL
Enter the RTMP URL of your streaming server. This ensures your broadcast is directed to the correct platform.
5. Test RTMP URL
This button allows you to test if the URL you’ve entered is reachable. Note that this only checks if the URL is valid and accessible; it does not verify if your stream key is correct.
6. Stream Key
Input your unique stream key to securely connect to the streaming service.
7. Video & App Settings
Clicking this button will take you to a screen where you can select the desired video quality and frame rate, as well as set the duration for each match quarter.
8. Enter Studio
Once you’re satisfied with your match settings, click this button to enter the filming view, complete with its dedicated controls.
Studio Screen Overview
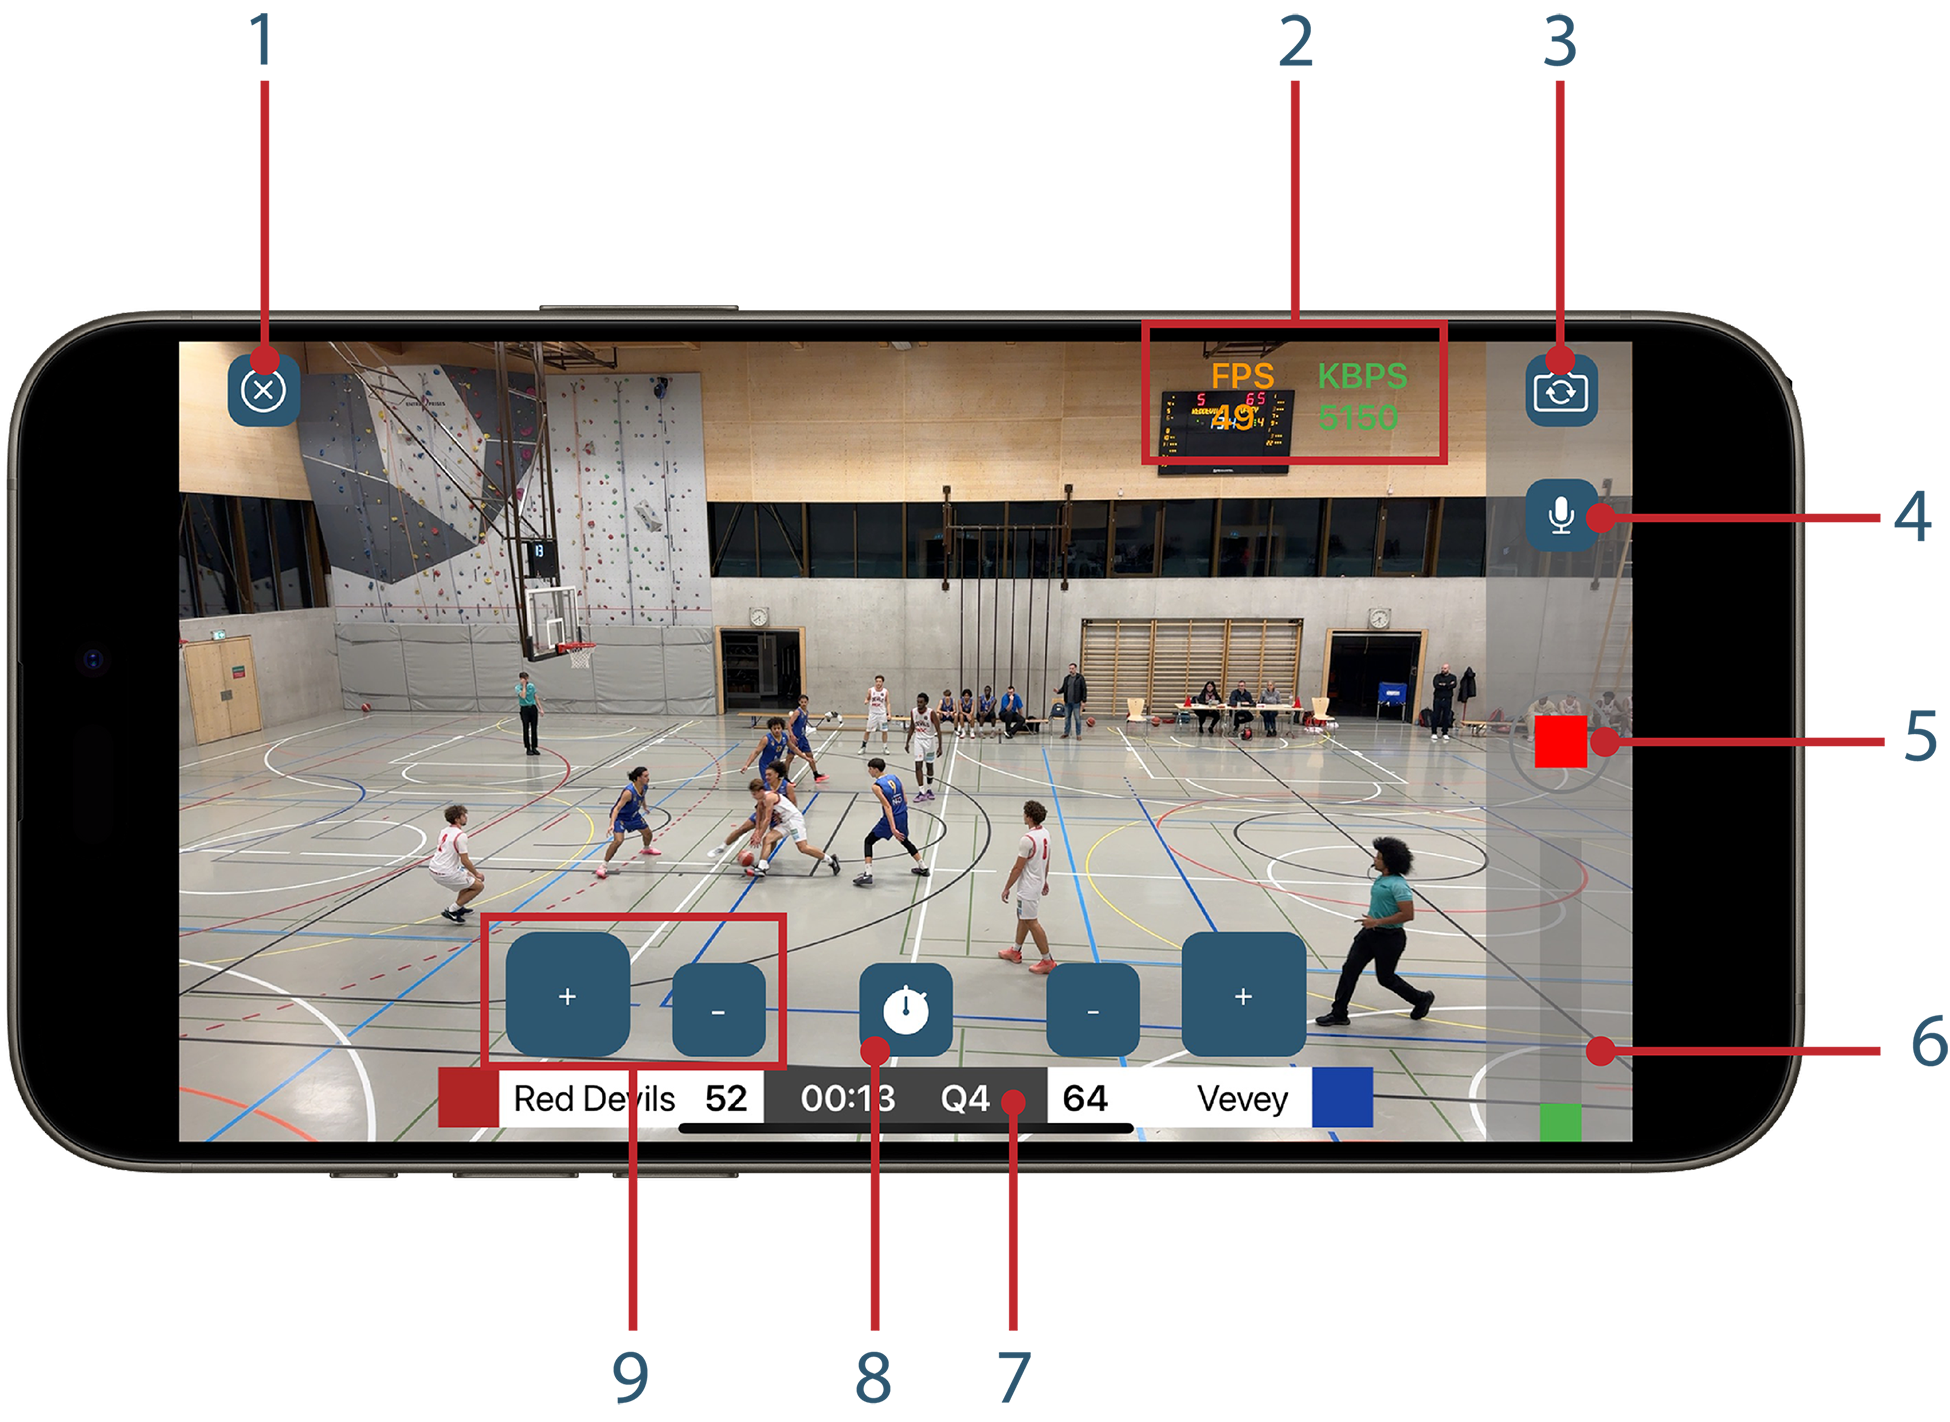
1. Close Studio view
Use this button to return to the home screen. If your stream is active, a warning popup will appear, informing you that the stream will stop if you exit.
2. Frames Per Second (FPS) and Bitrate Indicator
The current FPS is displayed here, reflecting the nominal framerate selected in the settings:
- Green: Nominal framerate is maintained.
- Orange: Framerate is slightly below nominal.
- Red: Framerate is significantly below nominal, which may affect the stream quality.
The FPS indicator can fluctuate rapidly, but if it consistently stays orange or red, it signals potential stream performance issues.
Similarly, the current bitrate is displayed:
- Green: Optimal bitrate.
- Orange: Below nominal bitrate.
- Red: Potential issue with bandwidth.
Rapid fluctuations are normal, but persistent orange or red indicates that stream quality may be affected.
3. Camera selector
Tap this button to switch between the front and back cameras.
4. Microphone mute
Use this button to mute the microphone.
5. Launch stream
Tap this button to start streaming. Once clicked, the video feed will be sent to the configured RTMP input.
6. VU meter
This indicator displays the audio input level, allowing you to monitor microphone activity.
7. Timer and Quarter Indicator
The countdown timer and current quarter are displayed here. Tapping on the timer allows you to adjust the time or change the current quarter as needed.
8. Timer control
Tap this button to start the countdown. Tap again to pause it.
9. Score controls
Above each team’s name, you’ll find two buttons:
- + to increase the score.
- – to decrease the score.